Please click here for a Tandem Account Overview.
Please click here for instructions on setting up a corporate Tandem account and the initial data sync.
Once a law firm's AppColl PM Plus account is connected to another PM Plus, PM Pro or corporate Tandem account, there are different options for controlling what data is synced. By default, the data being synced includes: 1) the matters associated with the client; 2) all external deadline tasks associated with the synced matters; 3) any custom task types associated with the synced tasks; 4) files associated with the tasks and matters; and 5) contacts associated with the synced matters and tasks.
Accessing the Account Sync Settings
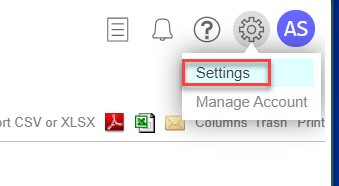
Account sync settings are accessed by clicking the gear icon in the upper right corner of any screen and then selecting Settings. Please note: only account admins can access settings. Once in the Setting page, select the Account Syncing tab.

Viewing a Default Sync
The following section describes the default data being synced once a Tandem account has been created for a corporate customer.
In the Matters module of your PM Plus account (i.e., source account), you should see a new report in the View Reports drop down menu. The report name is based on the client for the new Tandem account. In the below example, the client being synced is called ABISEE, Inc. So the report name is "Tandem Matters Sync - ABISEE, INC." If you run the report, it will show you all matters for client = ABISEE, Inc. This corresponds to the data being synced to the Tandem account.
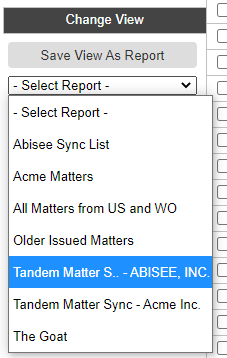
Viewing and changing matter data being synced - The columns being synced to the Tandem account are a subset of all the columns available for each matter. You can see the included columns by scrolling horizontally across the matter report. You can easily add or remove columns being synced by clicking the columns link in the upper right corner of the screen. Add or remove the desires columns and then save the report (e.g., click the Save View as Report button) and check the overwrite option.
Viewing or changing other data being synced - As described above, a data sync includes matter, task (and any custom task types), contact and files data. Task, contact and files data can also be customized to include what you desire. As with matters, there is a default set of fields synced for tasks and contacts. Files are slightly different and will be further described below.
Each account sync configuration has a Preview, View, Sync Now and Edit button. Each button is described below.

Editing a Sync
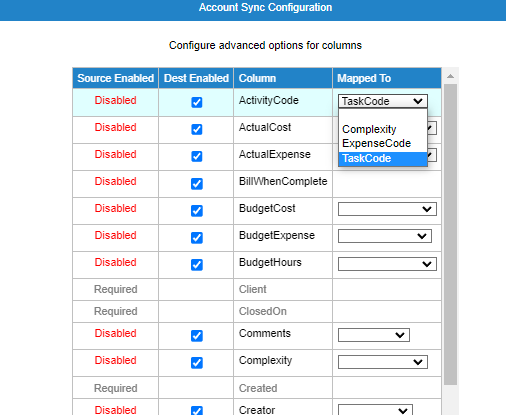
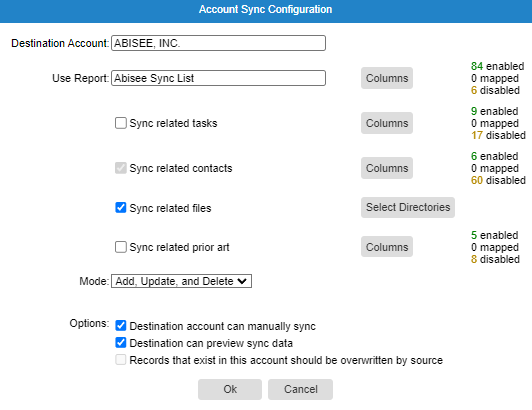
Clicking the Edit button shows the Account Sync Configuration popup window shown below. The configuration shows a number of options. Amongst other things, the window displays the destination account being synced and which matter report is being used for the sync. The window also show that tasks and contact data are being synced. There are columns buttons corresponding to tasks and contacts which allows for editing the columns being synced. Clicking on the columns button will allow different configuration for the source and destination accounts. The source account can enable or disable columns from being sent to the destination account. The destination account can disable columns from being sent to their account for the selected sync or map (redirect) columns from the source account into different columns in the destination account. To map a column, edit the sync from the destination account, edit the columns for the desired module, find the desired column to map, and select the “Mapped To” column in that column’s dropdown.
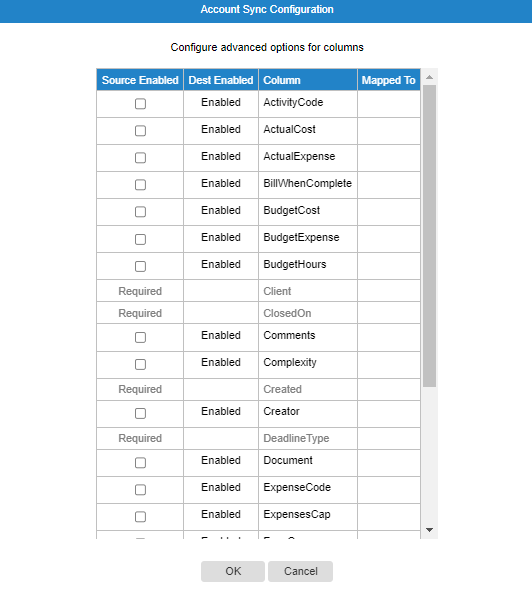
DESTINATION ACCOUNT COLUMN CONFIGURATION
The "Sync related prior art" checkbox allow for syncing prior art from the destination account to the source Tandem account. The "Columns" button allows for choosing which prior art data is being synced. By default, this option is turned off.The Mode drop down menu shows whether data is being added, updated or deleted. Different options may be selected to define whether data is just being added, added and modified or added and modified and deleted. Lastly, there are two check boxes called "Destination account can manually sync" and "Destination can preview sync data". The first checkbox allows for the destination account to manually sync their data at will. The second checkbox allows for the destination account to see what data will be synced when a sync is performed either manually or via the nightly automated schedule.
Previewing a Sync
Preview allows you to see what data would be synced if a sync is actually run. Clicking the Preview button generates a popup similar to the one below to show progress of the preview generation. The popup shows progress percentage, the number of records synced, and the number of records that will be added or updated if the sync is performed.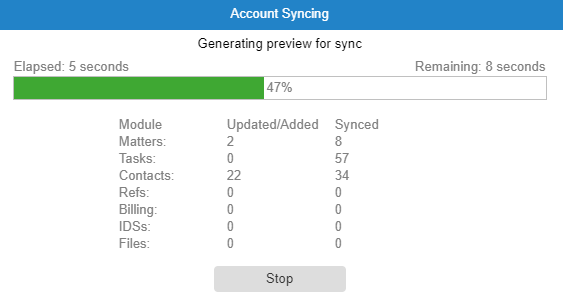
Once the preview generation completes, the popup will look similar to the one below, showing a detailed view of what changes will be made if the sync is performed. Use the arrows on the left side to view more detailed information.
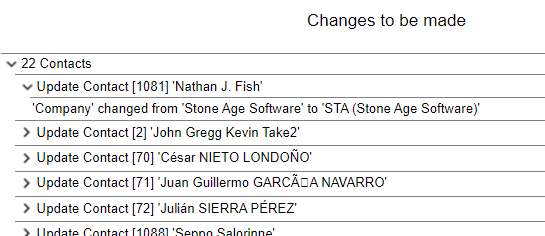
Reviewing Completed Syncs
Once a sync is performed, it can be reviewed by clicking the View" button. This will open a new browser tab which contains information on the current state of the syncing of records between the source and destination accounts. An example of this page is shown below. The “SourceRecordDesc” column identifies which record in the source account the row corresponds to. The “Status” column indicates if the record synced properly or not. The “Message” column provides detail as to what happened.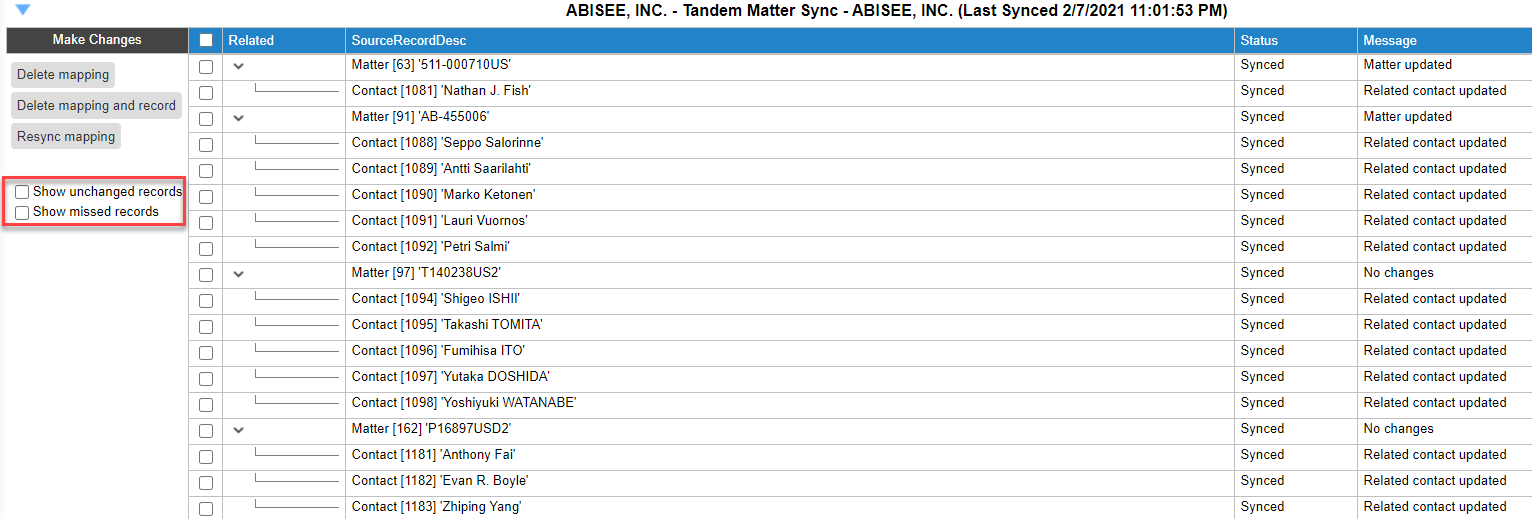
By default, rows are only shown if they, or a related record, has changes or ran into an issue while syncing. To show unchanged records or missed (not updated in the most recent sync) records, use the check boxes on the left side of the screen.
Manually Performing a Sync
All enabled Account Syncs automatically run every night to sync data in destination accounts. Account Syncs can also be run manually by clicking the “Sync Now” button to the right of the desired sync. Please note: depending on the number of matters to be synced, this manual process may take some time to complete.
Deleting Syncs
If a sync configuration is no longer needed, they can be deleted by clicking the Delete button. You will see a confirmation popup where you can choose to delete all the data in the destination account as well. Please note that sync configurations cannot be recovered once deleted.

Disabling Syncs
Account syncs can be disabled by unchecking the checkbox next to a sync definition. Checking the box again will re-enable the sync definition.
Deleting Information in the Destination Account
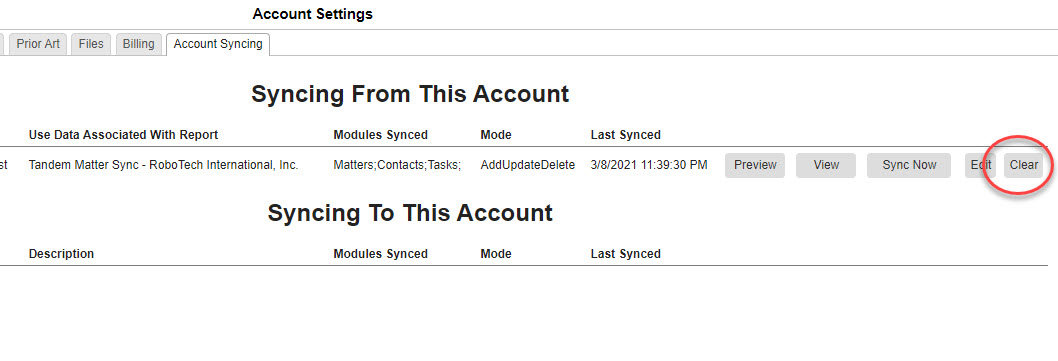
You may need to delete all information in a account that has been synced information from your account. To do this, click on the 'Clear" button. This process may take several minutes to complete. Please note that unless you disable or delete the sync the information will be re-transferred the next time the automated nightly sync occurs.
